Reviews
Funtek Raid Adventure : A low-cost, Land Rover style RC car
 The downside of not having folding props, from a crash damage perspective, is that upon impact, more pressure will be put onto quick release mount and motor. If the quick release mount does fail though, it's easy enough to unscrew and replace it.
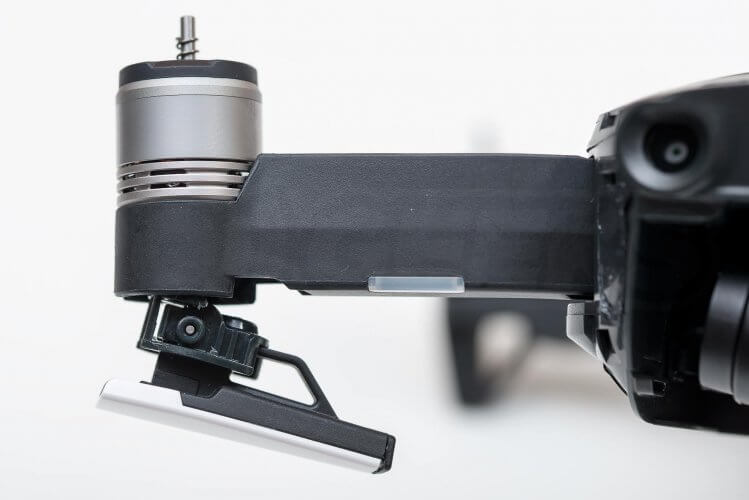
  The motors are held in place with 3 screws which can be accessed by removing the landing feet under each motor.
 The same applies to the front legs with the folding antennas. You just need to remove a screw first.

 With the top plate removed, we are then presented with an exoskeleton in which we get our first glimpse into the inside of the drone.
  You first need to pry off the silver plastic trim at the rear of the aircraft to reveal the remaining screw holes that hold the exoskeleton top plate in place.
  With the trim removed and the screws out, you can pull the exoskeleton off to reveal the inside of the aircraft.


 The GPS puck is located just up from where the rear arms meet the body and is held in place by three small screws.
  Everything on the mainboard is plug and plays it's fairly easy to take apart (although quite fiddly due to it's small size).
  Once all of the connectors are unplugged and after all of the screws are removed, you can take the mainboard off to give you access to the ESC board below.
  On the underside of the mainboard, below the SD card slot and USB port, is a small module held in place with some rubber dampeners. I can only imagine that this is the IMU which is I haven't been aware of DJI doing before.
  Below where the IMU was held, we can see the rear collision avoidance sensors and the top of the vision positioning system.
  The wires coming out of the arms are for the motors and LEDs. They are then soldered directly onto the ESC board.
 Once this is done you can pull the camera unit out from the top.
 And that concludes our DJI Mavic Air Teardown. If you found this article interesting and would like to see others like it, check out the rest of our Teardown Series on our blog. If you have any questions or would like anything clarified, feel free to drop us a message in the comments section below and we will do our best to get back to you. The Mavic Air is available from RC Geeks.
Written by
Phil Harris